😸 Logo Marking

Logo Marking is use by finger nails polish battle gray. Filling in roll marks with fingernail polish on firearms can be a fun project to make your gun have a more custom look and make it stand out against factory stock. This can be done with paint pens, crayons, model paint, or fingernail polish. In this article, we’ll focus on fingernail polish, but the methods have similar steps. When it comes to the finished product, you can recalculate your weapon’s additional β€œstopping power” by multiplying your caliber by zero.

HOW TO APPLY FINGERNAIL POLISH ON FIREARMS & MAGAZINES

What follows is the method I use for filling the roll marks with fingernail polish. If you opt to fill in roll marks with another material, just make sure you have the appropriate remover for that material.  Crayon isn’t the best material, but the surface material can be scraped off using an old rewards card, or a hotel key card if you’re too lazy to return them. Make sure your firearm is unloaded before you start.

For the fingernail polish method, the picture below details items to have on hand, such as a paper towel, gun cleaning cloth, cotton ball, q-tips, fingernail polish remover (acetone AND non-acetone for tricky spots or shallow roll marks), and of course, your color of choice.

To begin, I use rubbing alcohol to wipe the target area to remove any oils or grease in the roll marks.  Soaking a cotton ball works great for getting in the lettering.  Once it’s wiped clean, I let the alcohol evaporate.

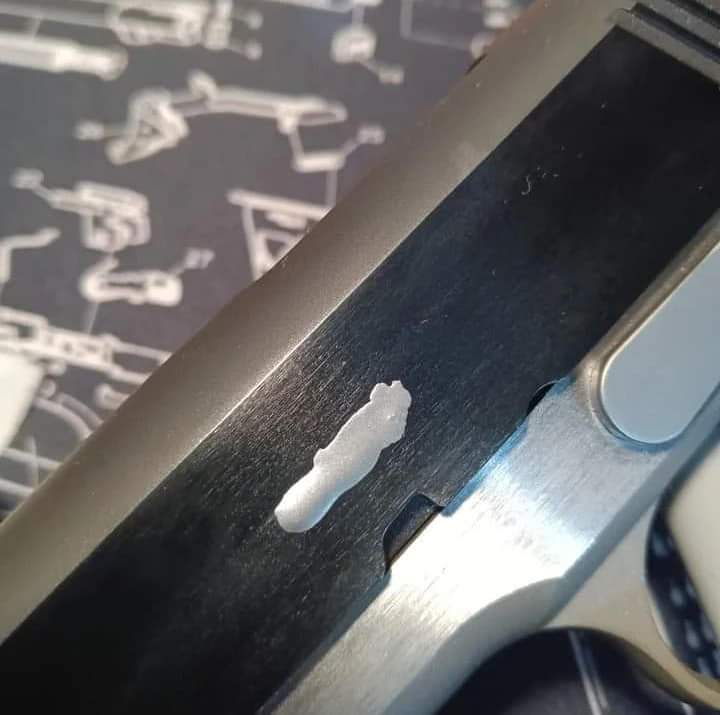
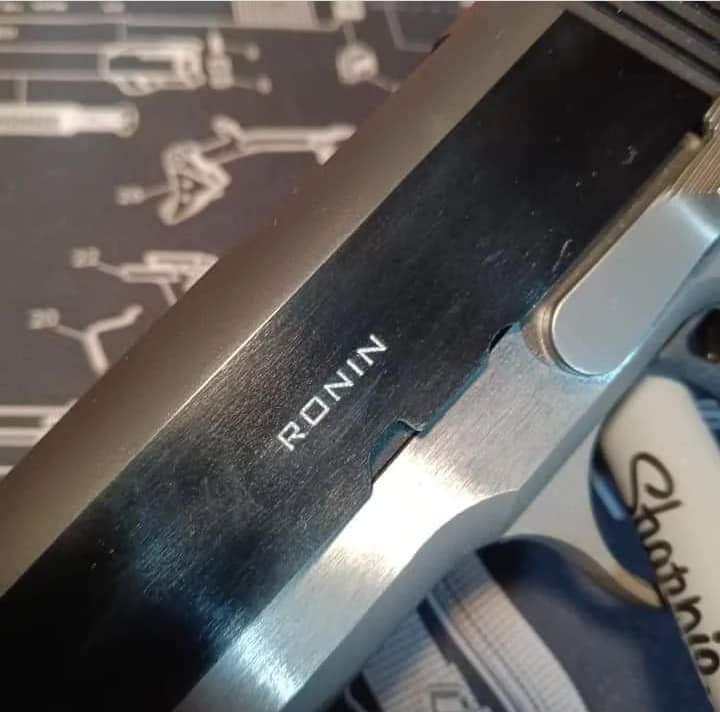
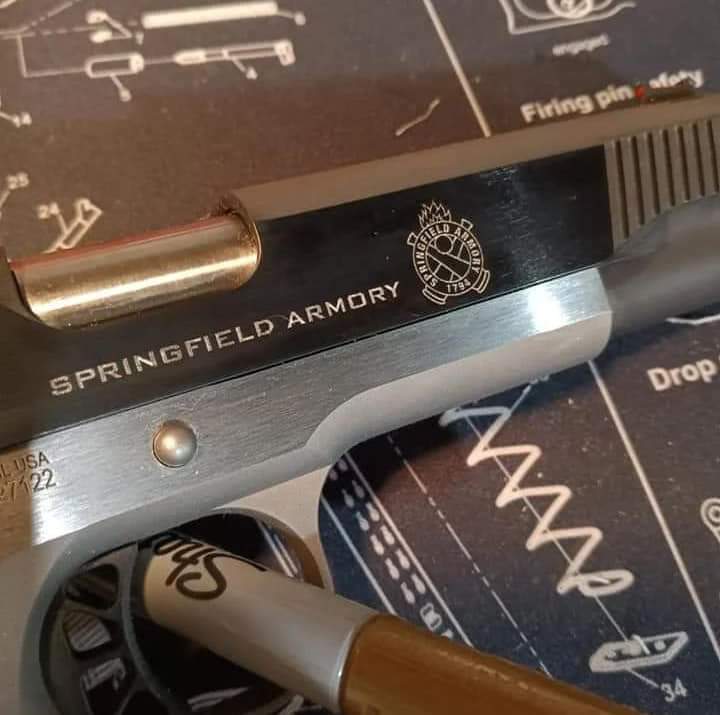
Next, I dabbed the fingernail polish onto the roll marks on the slide and magazine.  I decided on plain white.  The roll marks on the Phantom’s slide were deceiving.  They looked deep, but they are actually just wide and shallow, so I only used one coat.  I let it dry anywhere from 20 to 60 minutes.

Once the fingernail polish was dry, I used a paper towel a wet a spot down with acetone and rubbed it on the surface of the Phantom’s magazine.  The polish stayed in the numbers while it was removed from the surface.

Doing the slide was another story.  Due to the shallow roll marks, the acetone proved too good.  I switched to the non-acetone on a gun cleaning cloth.  I also stretched the cloth to make sure it was flat and took my time removing the polish on the slide’s surface.  I think the end result turned out well.

😸 RO Commands

β€œMake Ready” β€“ This signifies the start of the course of fire. At this time the competitor can handle their handgun and do more than just hold their PCC with the muzzle up. The firearm is prepared according to the Written Stage Briefing and the competitor assumes the start position. The RO must not proceed with the next range command until the competitor is in the proper start position and has stopped moving.

β€œAre you ready ?” β€“ This is a question to the competitor, but a response is not required, if the competitor is ready. If there is no response, the RO proceeds with the next range command. If the competitor is not ready, he must indicate to the RO that he isn’t ready.

β€œStandby” β€“ ROs should make sure the competitor is in the proper start position, and still, before issuing this command.

β€œStart signal” β€“ The start signal occurs one to four seconds after β€œStandby”. For USPSA Competition and Multigun matches, the start signal should be varied between competitors to prevent competitors from jumping the start signal. For Steel Challenge, the interval between β€œStandby” and the start signal needs to be consistent for all strings of a stage for a single competitor, but can be changed between competitors. It is very important for the timer to be set to instant mode so the RO can control when the start signal occurs in case the competitor starts moving before the start signal. The RO should not give the start signal if the competitor is moving.

β€œStop” and β€œUnload and show clear” β€“ If the competitor commits a safety infraction (DQ), a range equipment failure happens, or if there is some sort of external influence (e.g. person/animal downrange), then the first command is β€œStop” followed by β€œUnload and show clear.” It is very important to have the competitor unload the firearm and holster/flag before discussing why they were stopped.

β€œIf you are finished, unload and show clear” – This the next command that is given if β€œStop” is not used. If the competitor is finished, he/she should remove the magazine, clear the chamber, and lock or hold back the slide/bolt so the RO can see an empty chamber. Revolver shooters, empty the chambers and present the firearm with the empty cylinder swung out to the RO.

β€œIf clear, hammer down, holster” or β€œIf clear, hammer down, flag” (PCC) or β€œIf clear, cylinder closed, holster” (Revolver) – The competitor cannot fire a shot after this command is issued. To confirm that the chamber is truly empty, semi-automatic handgun and PCC competitors must pull the trigger. Revolver shooters are exempt from pulling the trigger since is it is easy to see that all the chambers are empty. Once the firearm has been proven to be clear, handguns are holstered and chamber flags are inserted into PCCs. PCCs must be held vertically up or down after the flag is inserted.

β€œRange is clear” β€“ This range command signifies the end of the course of fire and indicates that it is safe to move downrange to score and reset. This command should not be issued until a competitor has removed their hand from the holstered firearm and until PCC shooters are holding a flagged PCC vertically.

😸 Trigger Control At Speed

Setup Notes:

This drill only requires a blank wall. You should not use a target for this exercise. Do not aim at a particular spot on the wall, just practice aligning the sights.

Procedure:

Draw your pistol, get a sight picture on the wall, and break the trigger without disturbing that sight alignment.

Alternate start positions between all common variations.

Note: Do not engage a specific spot on the wall. It is counterproductive to this drill to have any sort of target. The idea is to get a sight picture against the blank canvas of the wall.

Focus:

Perfect your ability to shoot accurately with a time limit.

Goal:

Learn to “take your time in a hurry.” Have the ability to break the trigger accurately at speed. Your goal par time is 1.2 seconds.

Micro Drill:

Start with your pistol aimed at the target with a perfectly refined sight picture and your finger just touching the trigger (trigger not “prepped”). At the signal, press the trigger as fast as you can. Attempt to finish the trigger press before the end of the start beep. You don’t need to set the par time for this drill, you are just using the start beep as your “par time.”

Your goal is to keep the sights as stable as possible while you press the trigger.

Commentary:

This drill is designed to make you strive for a perfect trigger press while under severe time restraints. This will help with learning to hit long shots under match pressure, as well as helping you refine your grip.

I want to draw your attention to a few things in the procedure to make sure they are clearly understood. You need to get a sight picture on the wall, then break the trigger without disturbing the sight picture. It doesn’t say you need a perfect sight picture, you just need a sight picture. The reality is that in practical shooting there usually isn’t time to make things truly perfect. The par time for this drill is set so that you have time to make things really good, but perhaps not the perfect sight picture that people may want to wait for.

The really important element in the procedure is learning to break the trigger without disturbing what sight picture you do have. That is really the tricky part. The important thing to bring to this drill from


😸 Slow fire Trigger Control

Setup Notes:
This drill only requires a blank wall. You should not use a target for this exercise. Do not aim at a particular spot on the wall, just practice aligning the sights.

Procedure:
Draw your pistol and aim it at the wall. Align the sights as well as you can then press the trigger without disturbing that alignment. There is no time limit for this drill.
Alternate start positions. Be sure to use hands at sides, wrists above shoulders, etc.

Focus:
Perfect your ability to shoot accurately with no time limit.

Goal:
Keep the sights perfectly still as you push the trigger straight back. You shouldn’t perceive any movement in the sights at all.

Commentary:
Slowly drawing your pistol from the holster, gripping it properly, and then carefully breaking the shot so as not to disturb the sight alignment, is what many non-competitive shooters think of as dry-fire. This drill is it for them. As competitive shooters, we can do so much more. However, we still need to be able to do this drill.

I really like to focus on the sensation of moving your trigger finger in isolation. So many people have an ingrained habit where they pull the trigger using muscles from their whole hand. By doing a bit of dryfire, these people can get a sense of what it feels like to fire an accurate shot. Watching the sights will tell you the whole story about what your hand is actually doing. If you see the sights wiggle when you are pressing the trigger, you are doing it wrong.

It usually doesn’t take many repetitions for someone to start doing this with minimal problems. There are many shooters that can perform good trigger control in dry-fire, but they can’t do it at the range. If you are in this category, you should recognize that any disruption of your sight picture when you press the trigger back will absolutely show up downrange.

I recommend that you master this drill in dry-fire. When you are out on the range trying to perfect your slow-fire trigger control and using real ammo, don’t hesitate to unload your gun and reacquaint yourself with this drill. Alternating between live-fire and dry-fire will help you isolate the right “feel” in your hands and trigger finger.

😸 How Many Hours You Practice ?

About 2 hours a day. Set your goals and accomplish them. Dry fire seems redundant or somehow unnecessary to make an argument for the efficacy of dry fire training. When the weather outside is unpleasant or even dangerous, you can still dry-fire at home. It doesn’t matter if it is cold or raining or hot dry-fire will be there waiting for you !

For most competition shooters, vast majority of their training will be done in dry-fire. This is both terms of repetition and in terms of time commitment. I recommend you dry-fire everyday. If you truly want to improve, you will take time to put the gun on.

Obviously, live-fire on daily basis is non-starter for most people. It just plain isn’t going to happen ! The time commitment to travel to and from the range , shoot, and load ammunition is too much. Not to mention the financial burden of firing 300 rounds a day would cost crazy amount of money πŸ’²πŸ’° I only go out live-fire once a week only. But most people goes once or twice a month only.

Dry-fire you’ll going to work on your grip, draw, reload, movement, sight acquisition and so forth in dry-fire. You will program yourself to execute every little technique certain way. When you get out to the range to fire bullets, you are testing yourself. You are seeing if you have progressed ?

You can constantly strive to go faster, be more efficient, see your sights better, and so on. Don’t settle for sloppy trigger control when you are striving for excellence ! The point is to build habits that make you successful when firing live ammunition.

Most of these drills require that you use a par time. The way it works is that , you figure out your par time for some defined action. This will not be too difficult after you work with the drills in the book for a while. Soon, you will know that it takes you about X time, to engage Y targets, at Z distance. With just a little bit of scenario specific twerking, you will very quickly nail down a time that you can repeatedly hit. As soon you figure out your par time, follow the instructions of the drill.

With a single action pistol, such as a 1911 or 2011 firearm, you only get one pull of the trigger. The rest of the time you press back on an inactive ( or “Dead” ) trigger.

What does it mean to “Master a Drill ?” Often , people ask me if they should move on from a drill after they have “Mastered” it. “Mastering” a drill is a problematic idea. You can certainly become proficient with a drill. You can gain the skill to consistently nail the drill under the goal time. That doesn’t mean that you are perfect, it just means you have the ability to perform the drill to an adequate level. I wouldn’t call this mastery , but then again I wouldn’t neglect the other drills.

😸 Halo Neuroscience “Halo Sport 2”

Halo Sport is a brain stimulator that helps you develop muscle memory faster.

  • Gain skill, strength, and endurance up to 45% faster
  • Break through plateaus & set PRs
  • Accelerate results from movement training, with neuroscience
  • Backed by 4,000+ peer-reviewed studies
  • Trusted by NFL, NBA, MLB, and Olympic athletes
  • 20+ patents issued

Build muscle memory faster to increase readiness
Halo Sport makes every training minute count by building muscle memory faster, reducing the time needed to become a proficient marksman. Incorporating Neuropriming technology into training programs can result in more time for collective team training, leading to higher operational readiness.

Skill Acquisition

Movement to target
Target acquisition
Transitions between weapons or magazine reloads
Safety

Trigger Discipline
Footwork, balance, and stability
Threat discrimination

β€œI’ve been wearing Halo Sport for the last five months. I identified a problem at one point last year where my left foot was dragging and it wasn’t allowing me to be able to shoot as soon as I entered a position or maintain that balance and stability that I needed to fire at a high rate of speed. Halo Sport has provided me a platform in training at the gym to make me better at what I do on the practice field and the competition range.”

😸 PACT Club Timer III

One PACT Club Timer III, one 9 Volt Battery, one PACT Sticker, and Instruction Manual.

Features:
– Records multiple shots in a single string
– Displays the time to your first shot
– Review split times and each shot time in the string
– Set par time
– Toggle from instant or delayed start
– Extra loud buzzer (good for range use)
– Ergonomic design for training usage
– Waterproof custom sealed conductive rubber keypad
– Power Source: One 9V battery

😸 Testing Match Grade Ammunition

Testing match grade ammunition with chronograph finding (FPS) “Feet Per Second”. Power factor is calculated by the formula: bullet weight times velocity divided by 1000. Power factor requirements are determined by which division one competes in, and might be caliber specific. For .45 ACP must be 165 for “Major” and 125 to be “Minor”

My testing (14) Rounds to see meet power factor ? About 170 power factor is maximum and close to 165 power factor low. Then (28) Rounds for accuracy testing.

Power Factor Equation:Β Bullet Weight x Bullet Speed It’s simply the weight of the bullet in grains, multiplied by the speed of the bullet in feet per second. Example: A . 45 ACP round with a 200 grain SWC bullet might travel downrange at 850 fps. The Power Factor of that load would be 200 X 850 = 170,000.

SYNTECH ACTION PISTOL (SKU AE45SJAP1)

Caliber – 45 ACP

Velocity – 795 fps

Bullet Weight – 220 gr.

Calculated Power Factor – 174.9

Declared Power Factor – Major

USPSA Power Factor – Major

OAL – 1.210-1.230 inches